Have you ever wanted to incorporate digital resources into your speech sessions, but weren’t sure where to start? In today’s episode I talk all about leveraging tech to minimize stress. And the good news is you don’t have to be tech-savvy to use these tips!
Demos & Resources mentioned in this Podcast
Links & Resources
FREE HANDOUT WITH ALL THE LINKS
5 Videos for Speech Therapy Playlist
Full Transcript of Podcast: Leveraging Tech to Minimize Stress
Episode 58: Leveraging Tech to Minimize Stress
You're listening to the Speech Space Podcast, a podcast full of tips and resources for SLPs. I'm your host, Jessica Cassity, and this is Episode 58.
Today, I'm going to be talking about leveraging tech to minimize stress, how to go digital in your speech room today. So this is part of the first-ever SLP Live POD Conference, and I'm super excited and honored to be a part of it. Before we dive in, I did want to give you a brief overview of what we're going to be talking about, and I'll talk a little bit about what you're going to learn by the end of the podcast. So for those of you who regularly listen to my podcasts, you will notice that this episode is a little bit longer and the format might be a little bit different. And that is because you are eligible for receiving continuing education credits for listening to this episode, if you complete the quiz that goes along with that by the 9th of November. And if you listen at the end, Venita's going to pop on and she's going to tell you exactly how you can access that quiz.
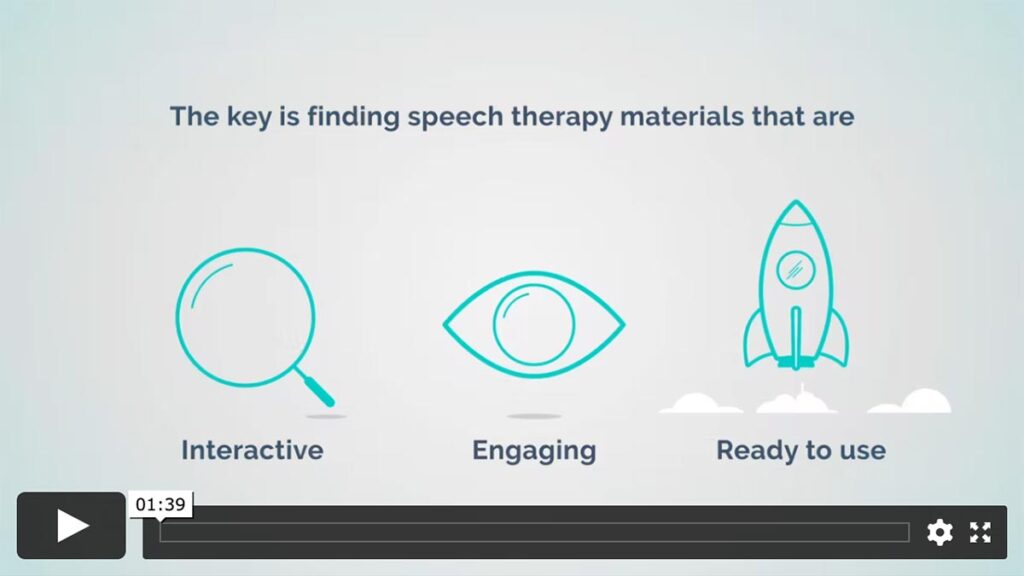
So let's go ahead and talk about what we're going to cover today. We're going to go over the benefits of going digital in your speech room. We're going to talk about which type of SLP would benefit the most from using digital resources. We're going to cover some free and paid digital resources that are available for SLPs to use. And in the section on digital resources, we're going to cover materials like No Prints, Boom cards, etc. And we're also going to touch on Google, or you might know that as the G Suite for Education, we're going to cover some videos or how to use videos in your speech room, and then talk about digital books that you can access online. We're also going to cover the difference between a No Print and a No Prep resource. And we're going to talk about ways to ensure that you are responsibly using technology with your students and clients. At the end of this course, you should be able to describe three benefits of using digital resources, list three digital resources that are available for SLPs to use, describe the difference between a No Prep and a No Print resource, and you can explain why it's crucial that technology is used appropriately. I do realize that a lot of the resources that I mentioned today might be difficult to visualize. So in the show notes, I will give you the link for how to access the show notes at the end of the show. But in the show notes, I have created some video clips to supplement some of what I've discussed here today. So now that I've gotten through all of the introductory information, let's go ahead and dive on in.
Okay. So like I said, my name is Jessica Cassidy. I am a speech-language pathologist. I've been an SLP for 11 years, and I have experience working in various settings. I've been in the school setting, private practice, hospital, long-term care, you name it. I have a passion for developing resources to help SLPs spend more time with their students and less time planning. I recently relocated to Florida to be closer to my parents, and I just started homeschooling my children. I did want to say that I do own and operate The Digital SLP membership site. Therefore, I do receive income from that resource so I just wanted to provide that financial disclosure. And let's go ahead and get started and talk about the benefits of going digital in your speech room.
So using digital resources is just a really great way to engage your students. You know, a lot of your students are probably already using a lot of digital resources outside of the speech room. So only makes sense that we'd be using these things in the speech room as well. Not only are digital resources very engaging but the beauty of them is that there are really very little prep work required. So there's no cutting involved, there's no laminating, there's no assembly that's needed, no searching for a color printer. And there ends up being a lot less clutter in your speech room, which is a nice kind of side benefit there. So I just wanted to share personally why I decided to go digital. And there's a few reasons actually. One of them is that I was having trouble finding the resources that I needed in an efficient way. At one point I was servicing different locations and I just felt like I was just having a really hard time accessing what I needed efficiently. I would find something I really liked at one site, I wouldn't be allowed to take it to another site. When I would get back, maybe it wasn't there because another SLP had moved it or I would find something in a book and then I would be like, oh wait, what book was that? What page number was that? Anyway, I was having tough time being efficient just with utilizing resources. When I did find a resource, like I said, I wasn't always able to bring it along to different sites. So I was doing a lot of photocopying and a lot of transporting and finding a school that would give me access to a color printer was unexpectedly challenging. Now I've talked to other people who have similar challenges, but I've also talked to some people who seemed to be very lucky, and that they have access, kind of unlimited access to a color printer. So if that's you, then, then that's amazing. But I was spending way too much of my personal time trying to solve these problems of how to easily transport resources, how to easily find resources, how to easily print resources and how, you know, I was always trying to brainstorm how I could save some time because I was doing so much prep work as well.
So I actually started creating my own No Print materials—and I'm going to talk a little bit more about what No Print materials are—but I started creating my own No Print materials and using some other online resources. And I found that that really made things easier for me. And it made me much more efficient and it made it a lot easier to find what I was looking for. So I just want to go over, you know, some of the benefits that I found when I made the switch to digital. It easily allowed me to transport things from one site to another, especially if something was just on the Internet, I didn't have to carry it anywhere. You know, I might have my iPad with me, but it allowed me to easily transport things because they were digital. It allowed me to become more organized because there was less waste and clutter floating around fewer piles of papers to sift through, to try to find the activity I was looking for. It allowed me to cut back on my planning time because I could reuse the same resource for multiple goals. It allowed me to use graphic-rich materials without the need to search for a color printer. But most importantly, and I already kind of touched on this a little bit, but it gave me back time. It allowed me to be more efficient.
So you might be wondering if you have to be super tech savvy to get started with digital resources. I get this question a lot, but the answer is no, you really just need to be willing to learn. And I always suggest just trying one thing at a time, because it's so much easier to digest that way. So say maybe something like sampling a simple No Print resource would be a great place for you to start. And like I said before, I will get into exactly what that is in just a couple of minutes. But because I am going to be sharing so much information with you today, my best suggestion is just to choose one of the things that I mentioned and to try it out at the end of one of your sessions, that way there's really no pressure. And if it doesn't go as planned, then it wasn't the bulk of your session, it was just at the very end. And if it doesn't work for you, then you can always kind of regroup after the session and plan something different to try for your next session.
So you might be wondering which type of SLPs would benefit the most from using digital resources. So I am a little biased. I think that almost all SLPs would benefit in some way from using a digital resource. But specifically SLPs who are looking to cut down on their planning time, definitely teletherapists, SLPs looking just to add some more engaging resources to their toolkit, looking to kind of freshen things up a little bit, definitely SLPs who service multiple locations, and SLPs who are looking to cut back on clutter in their speech room. So let's go ahead and talk about some free and paid digital resources that are available for SLPs to use and the section on digital resources, we're going to cover No Pints and Boom cards specifically. And then we're going to talk about Google, or you might call it G Suite for Education, and then we're going to touch on videos and how to implement videos in your speech room or to access them. And then we're also going to talk about books and accessing books digitally.
So let's go ahead and start off by talking about No Prints. So a no print is essentially a fancy word for a PDF file that is interactive. So it's a resource that's been created with the intention of not needing to print it. It does have clickable links in the resource so it is interactive. If you touch something, it will advance to the next screen. And that might just be as simple as an arrow that advances you forward to the next slide. It doesn't need to be super fancy, but it's just essentially something you do not print out. Because they are PDF files, there's no sound embedded in these resources. They can be used on tablets, computers, or interactive whiteboards. I personally use my iPad the most with no print resources. They are opened with PDF readers, free ones like Adobe Acrobat or iBooks. Those two both work great. And they're really great for SLPs who are on the go or doing teletherapy. I think I touched on that already a little bit, but like I said, I am a little biased, but I do think most SLPs would benefit from using this type of resource in one way or another. And since I can't do a live demo of a No Print resource and show you exactly what it looks like in action. I did embed a video in the show notes of this episode. So like I said, I will give you the link for that at the end so you'll be able to see some of the resources. As it can be hard to kind of conceptualize or visualize when you're hearing about something instead of seeing a live demonstration.
So I did want to go ahead and differentiate between a No Prep and a No Print resource because those terms get thrown around a lot and it can be a little bit confusing, especially if you're new to the world of digital resources. So a No Print resource is simply a resource that does not need to be printed out. So it is a No Prep resource also because you don't need to do anything prep wise like cutting or laminating to get it ready for your session. There are also many resources out there that are called No Prep resources. And those are not to be confused with No Print resources. So resources that are marketed or advertised as No Prep are often worksheets that can be printed out and ready to go. Now, those are great but I just want to differentiate the difference between a No Print and a No Pprep. So similar to a No Print, they require No Prep work in advance to use in your session, but you do need a printer for many of these No Prep resources that are out there. So you are printing them out. So just to recap, No Print, you don't print, although it is also considered a No Prep resource because you don't need to prepare it. And then there's a No Prep resource, which is something that doesn't require preparation to use. And it could be a printable or it could be a No Print. So I know that, that was a lot there, but I hope my recap helped you to differentiate between the two.
All right. So let's go ahead and move on and talk about Boom cards. So if you have not heard about Boom cards, they are self-checking task cards. Now this is a web-based platform. If you're using your computer, they also do offer an app, which you can access on your tablet. So you do need to create an account to access this type of resource. And there are free accounts that you can use and you can track data for up to, I believe it's three students for free and you can continue to use your free account forever. So you don't ever have to upgrade. But if you're looking to use this for data collection purposes, then you'll probably want to learn more about the paid subscriptions that they offer with data tracking abilities. For a nominal annual fee, you can add the data tracking feature for additional students beyond those three that come with the free membership. The fee is really, really reasonable though. At the time of this recording, it's only $15 a year for up to 50 students. And that's assuming that you don't want to create too many of your own resources. I believe you can make about five with that subscription plan, or if you want to do the $25 a year plan for up to, I believe you get up to 150 students, then you can make an unlimited number of decks for your students. So if you were interested in creating some Boom cards, that would be the better option. And if you were not, then the $15 a year would be the better option. So like I said, the plan you choose really depends on how many students you see and if you feel like you would want to create content for them or not. Many people don't have time for that, understandably so. So they opt to just purchase the decks from the marketplace. And now if you wanted to learn more about Boom cards, or if you wanted to try some out, there are plenty of free Boom cards circulating on the Boom platform. So you can head on over to boomlearning.com. And you can go ahead and set up your free account and kind of play around with it and see what you think.
All right, let's go ahead and talk about Google. Like I said, your organization might call it G Suite for Education, also known as Google. It just depends on the way that you're accessing it. So there are actually several different apps or services within Google that I'm going to touch on. I mean, there's really just so much. It can actually be a little bit overwhelming, but also exciting at the same time, because there are so much that you can use through Google for your speech therapy sessions. So the first thing I'm going to mention is called Google Keep, and that's something that you can use on your computer or on an app on your iPhone or iPad. So if you love sticky notes like I do, then this is definitely for you. If you frequently lose sticky notes and misplaced them and had them scattered all over the place, then this is also for you. So this is kind of like a mess-free way to use sticky notes. You can put them in a checklist format. So if you have upcoming IEP meetings listed, that can be really helpful. If you want to have a list going for upcoming documentation, that's helpful too. You can have just your little title on that sticky and then some bullet points below, or you can check it off whenever you have completed that documentation. And if you use Gmail in some capacity, it makes it even easier because you can have these notes and reminders displayed to the right of your inbox, but you definitely don't have to use Gmail. You can just use the app or you can just use it right on your desktop. It's super easy. For next thing that I'm going to touch on and only briefly is Google Classroom. So Google Classroom allows you to create your own resources, if you wish. It allows you to assign homework to your students. And it allows you to share video links or YouTube videos with your students and allows you to really just to stay organized with different resources. And it's kind of a nice little hub for divvying out work to different people. So it can be really helpful with planning. So if you're trying to plan out your sessions, or if you're trying to give homework for your students to do after a session, this can be a really great way to assign that. The next thing I'm going to touch on is Google Sheets. Now Google Sheets can be really great for data collection. Google Sheets is very similar to Excel, but the great thing is that you have access to it from Google Drive. So you always have access since it's web-based. You can set formulas to calculate percentages for data collection, which is beautiful. Once you get a nice template going, you can just copy it over into each and every new spreadsheet. You can also create different tabs for different students to keep it all organized. You can create different sections for different goals, and you can really customize things for each student. So unlike, say you created a template on a sheet of paper that you photocopied over and over, this way you can really design within your Google Sheet, you know, what you want to do for each student. So maybe one student has way more goals than that printable paper had space to accommodate, so you can really kind of work things in a way that meets your needs, I guess, for documenting the needs of each and every student that you have. Google Slides is the next thing that I want to touch on. It's just a really quick and fun way to create your own resources for the times that you have a student with a very specific need, and maybe you don't really have a resource that matches that need at that point in time, so it's a really quick way to kind of assemble something yourself. I recommend if you're looking for pictures to put in a resource that you're creating in Google Slides, there's a site called pixabay.com. And you can go there and you can download resources. I'm sorry, not resources. You can download photos for free. So that's a great way to kind of spice up your resources, if you're trying to, maybe you're throwing something together on a specific social skill that you're targeting. That's a really great site for getting some better quality images than you might get if you just did a Google image search. So you might be wondering about privacy and data and safety when using Google. So let's touch on that for just a minute. If you are using G Suite for Education, which might be the case for those of you working in a school setting, then you can rest assured that it is deemed FERPA compliant. If you're not familiar with FERPA that stands for Family Educational Rights and Privacy Act. And in short, it protects the confidentiality of student educational records. If you are using Google for your private practice and you're seeing Google Sheets with identifying information, then you would need to set up a Business Associate Agreement, and then accept the HIPAA BAA, which is the business associate amendment. You need to do that through G Suite, and I'm going to add in the show notes, a link for how to set that up. It's just a link that you can click out to, and it's going to take you right to Google, and it's going to go through all the steps that you would need to go through if you wanted to make sure that you're HIPAA compliant. So it's great that Google is offering these ways to make sure that we're protecting our students and our clients while also using their services.
All right, let's go ahead and talk about videos now. So I just love using videos in speech therapy because students are already watching videos on their own time. So this is really just kind of an extension of what many of our students are already doing outside of the speech room anyway. So it's very likely to grab their attention. Before I talk about a couple of sites that I like to use. I did want to mention three very basic tips that I recommend for everyone who's going to be using video in their speech room. So, first of all, I always suggest screening the video. You always want to make sure that you watch the video first. There have been many videos that I've watched and thought were great, but then I've had to abandon them because the last 30 seconds were inappropriate and that sadly happens more often than I would care to admit. If you feel like you really just don't have the time to do that, then an alternative is to make sure that you use a video from a reputable educational channel. Like, let's say you wanted to do something science or space then from the Discovery Channel or something like that. And I should go back a little bit, I should rewind there. When I said that that's happened more times than I would like to admit that did not happen in the speech therapy sessions. That actually happened because I was screening the videos beforehand and I always breathed a sigh of relief. And I was like, Oh, I'm so glad that I watched that on my own time first, because had I been showing that in the middle of a session, that would have been a disaster. So my next tip is to keep it short. I aim to keep videos anywhere from 30 seconds to five minutes long. Anything longer really just takes up too much of the session. And it doesn't really leave enough time for discussion. Additionally, anything beyond five minutes and you really might just lose the interest of some of your students. My last tip is to use an ad blocker. Now what is available to you will vary based on the web browser that you're using. I used Google Chrome and the ad blocker that I used is called Ad Blocker for YouTube. So very basic name and it seems to get the job done. I should clarify though that this blocks pop-ups that pop up on the video that you're watching during the video, not necessarily those video ads that are now sometimes coming at the beginning of the video. I have not learned of a way to escape those yet. But if anybody else has, please feel free to let me know and I would be happy to share that with everyone. So one of the sites that I do like to use for video is Edpuzzle. And the reason that I like Edpuzzle is because it is a collection of educational videos. So the library and their polls from sites like YouTube and Khan Academy and similar sites like that. And I liked that it's educational-based so you're not just sifting through lots of random videos. You know, that these things are most likely going to be useful for your students. And you use those videos to create video lessons. So you can use the built-in editor to trim videos and embed your own questions. So if you're watching a specific video, you can put in a little, you can insert a little marker and you add a question and it pops up and then either you or your student can type the correct answer in. There are also ways that you can track student performance on these lessons as well, so that's a bonus too. And if you want to learn more you could go to bitly.com/edpuzzleslp, or you could simply just Google Edpuzzle. Now, the other site that I like is YouTube, which I'm sure that every single person listening has heard of. You know, there's a wide collection of videos that students can watch and discuss and have meaningful and naturalistic interactions. And the reason for those kind of goes back to what I was talking about before is that students are already doing this. They're doing this outside of the speech room, they're doing this with their friends. They might be doing this with their families where they're watching a video, they find something that's crazy or hilarious, and they are laughing about it and talking about it. So we're just bringing that into the speech room and making sure that we are choosing videos that are appropriate, where they can have those same naturalistic interactions. I suggest creating playlists and saving your favorite videos, so then you can easily refer back to them later. So you could even group them by grade ranges, like K to two, three to five, six to eight. So you could keep them organized that way, you can organize them by topic, but just some way to make it easy for you to find the videos that you want to refer back to later. And I did create my own playlist for you to sample it's called Five Videos for Speech Therapy. And you can access that by going to bitly.com/5speechvids. I will be creating a handout with all of the links that I'm mentioning in this podcast. So please don't stress out if you've missed any of them. I'm going to put them all together so you will have everything in one place.
Now I'm sure that some of you might be wondering, okay, now that I have some videos, what do I do with them?What goals can I work on with videos? So I'm just going to breeze through a few ideas. So for articulation, I would suggest finding a video that contains a particular speech sound that pops up frequently throughout that video, and then having your student work on identifying when that speech sound occurs. And then also reciting that speech sound. As they get better and better at saying their sounds, then you want to move on to having them retell the events of the video, making sure that they're using their good speech sounds. Another thing you can work on is social skills. So you can find a lesson about a particular skill that you're talking about. For example, there's plenty of videos out there about keeping your hands to yourself or waiting your turn. You could also watch a short video clip in a social skills group, and then you could work on making relevant on topic comments. So that's always a fun one. You could also, for apraxia, find some nursery rhymes with repetition, which most nursery rhymes have. And then you can work on reciting the rhymes with your students. For fluency strategies, you could watch a video and then have your students talk about that video while using their fluency enhancing techniques. You could do sequencing by having your students watch the video and then put the events in order from the video that they just watched. You could have them do a summarizing activity where they watch a short clip, and then they give you a summary of what happened. So really the opportunities are endless. I mean, I could go on and on here, but I think that you get the idea that videos can really be used in so many different ways. You just have to kind of pick a goal and then think about how you can work that goal into the video that you're watching that day.
All right. So let's go ahead and move on to books. So my first suggestion is to utilize your public library. So when you get a public library card, you will also gain access to all sorts of wonderful online goodies. So many apps that are out there, some examples, Hoopla, OverDrive, and Flipster. So I'm just going to kind of talk a little bit about what those feature, it's really going to depend on your specific library and which services they're affiliated with, which apps they offer. One tip I would like to give though, is to look into getting an educator card. So if you work in the schools and you have a school ID of some sort, then you might be eligible for an educator card. And what's great about that is that also going to change depending on your library, but I'm going to share personally for me at my library, I don't have to pay late fees, which is amazing. I also have longer checkout periods and I can check out more resources. So those are just some small perks that I think are definitely worth it. So if you're able to get an educator card, I would highly suggest doing so. So Hoopla is one of the apps that I referenced earlier. It's great for music, movies, audio books, also has graphic novels and eBooks. So of course you're not going to be using all of those things but that's just an example of how much you can access on this app. That is probably my favorite app at the moment. I just feel like there's just such a great variety that you can pull from there. And there's also OverDrive, which I'm sure many of you have heard of, where you can access eBooks and audio books, and I believe also videos now. Now Flipster is one that is new to me but that's great for magazines. And the thing I like about is that maybe you have a student who has a very specialized area of interest. You know, I'm kind of thinking about students on the spectrum, not to say that those are the only students who would benefit from this resource, but maybe they have something that's kind of really specialized and you could find a magazine on this subject, and maybe you could somehow use that magazine during your speech therapy sessions to work on some of their speech and/or language goals. So those are three of the resources that I like to use from my public library. Epic Books is also another website and app, not affiliated with public library at all, this is a totally separate category here. Epic Books is an online book service that offers immediate on-demand access to over 35,000 illustrated books and chapter books, and it's geared towards children ages 12 and under. They have Read To Me Books, they have videos, and they have audio books as well. And they also just have regular books that you don't have to use the Read To Me feature. If you want to read it aloud to your students, which I always suggest doing when possible. They have some of their own material that's unique to Epic books, but they also have many stories and classics that you're already familiar with, which I liked, and it's free for educators. So you do have to be using the site, I believe, during school hours for that. And if you're not an educator, it's only $8.99 a month at the time of this recording. So not too bad. And they do offer a free 30-day trial. If you wanted to give that a try before you signed up. So that's always, you know, nice to do to kind of see if it's something that would work for you or for your students. And the other thing I like is you can save your favorites. So if you have favorite books that you like on there that you like to access frequently, you can kind of go back to them easily. If you wanted to learn more about that, you can go to getepic.com/app. Now the last online resource that I'm going to talk about is Amazon Prime Reading. And you can check out if you're an Amazon Prime member, then you have access to Amazon Prime Reading. So this is not going to apply to everyone. So I'm not going to spend too much time on this, but I did want to say that if you are an Amazon Prime member, then I would suggest going to amazon.com/primereading. And just see if there's any titles in there that you would like to use with your students because you do have access to them as a Prime member. There's also something called Kindle Unlimited and that is a paid service. However, they do offer a 30-day free trial. So you could sign up for that to see if you like it. But it's very similar to some of the other services that we've talked about today. It has a large selection of online titles that you can read from your device. You do not have to have a Kindle to be able to access them. They have a cloud-based reader now that you can use right in your what browser. And there's also a free app that you can use if you did want to use your tablet or iPad.
All right. So let's go ahead and move on to apps. There are so many apps out there that are amazing. It can also be super overwhelming too, because you're not really sure what's great and what isn't, and what's going to crash on you, and what is a higher quality. So I just, you know, feel like I could go on and on about apps on a whole other podcast, but I wanted to try to squeeze in my top four app recommendations for people who are just starting to get acquainted with technology or apps. All of these are less than $5 so they're all also very affordable to those who are on a tight budget. And I did want to throw out there that I'm not an affiliate for any of these. I'm only recommending them based on my personal experience. I know there's loads of great apps out there, and there are some that are pricier and there are some that might be perfect for a very specific population. But for the purpose of this section, I just wanted to stick to apps that were affordable and general and easy to use. So you could use these apps with a variety of students. And like I said, even for SLPs who don't feel a 100% comfortable using technology in their speech room yet. So the first app that I really love is called Toca House. And this app just has so many interactive features for students. And it's honestly, probably one of my favorite apps of all time. My students love it, but I also love it too. It wasn't created specifically for speech therapy, so it's not a speech therapy app per se, but there are so many language goals that you can sneak in. So it's really great. And there's a mail sorting activity where you can work on core vocabulary like put in and you can talk about same/different because you're matching the color of the mail to the color of the mailboxes. There are activities where students get to interact as if they're ironing clothing or washing dishes, which again can be great for teaching core vocabulary when you're not always able to use those things in real life to demonstrate, you know, it can be tricky to have an iron in your speech room or to wash dishes. So these are great ways to teach some of those core words without having the hands-on component that, you know, of course we always want to use hands on when we can, but when it's not available, this is a great alternative. There's another app, kind of a funny name. It's called What Diff. This is one of those what's the difference apps that has two pictures that have some differences between the two. And I actually learned about this app when I was working in a medical setting with some neuro TBI patients. But what I love about this is it's really great for comparing and contrasting. There's a timer, which I don't love, but you can select freeze time, the freeze time feature, where it essentially stops the clock to give your students a chance to find the difference. And I like to do that because I don't want this to be an activity about racing against the clock, but I always have my students tell me the difference that they see before they tap on it, because it might be easy as we know for our students to see a difference, but it might not necessarily be easy for them to find the appropriate language to describe what that difference is. So I have them tell me what they see in terms of what's different and then they click on it and then they can go on to find the next difference. So it's really fun. And that's another one that admittedly I like to do right along with them. It's fun. The next app is called Visual Timer. Now this is a very simple no-frills visual timer that is great to use with your students who have difficulty with transitions, or even just as a way to help students understand the flow of a session better. You select the amount of time that's displayed in a big red block. And then as the countdown timer gets to under 60 seconds, it turns to green. And that alerts the students that the time is almost up. So it's a nice way to have a visual app if you're wrapping up an activity or like I said, transitioning to something else. It's just a nice way to have that there, to kind of let them know what to expect. The last app I'm going to recommend is called Splingo's Language Universe. And I really liked this one because you can alter the complexity of the sentences and it gives a verbal directive and students drag the pictures around to demonstrate their knowledge. It's really great for working on multi-step directions, it's got prepositions embedded in there, possessives, adjectives, action verbs, and more. So really great for auditory comprehension.
All right. So before we wrap up today, the last thing that I wanted to talk about is ways to ensure that you are responsibly using technology with your students and clients. So I recently did a podcast episode on this, and this is what I'm going to share with you now is going to be very similar to what I shared on that podcast. The first thing that I suggest is not using the iPad with your students who are on the younger side and by younger side, I mean, usually, kindergarten and younger, I just feel like these guys really need to be having lots of hands-on experiences. So think like sensory bins, doll houses, toy cars, that kind of thing. They already get enough exposure to technology. And there are just too many fun and simple ways to make speech therapy engaging for them without using an iPad or a computer. The exception here of course is if you're doing teletherapy or I guess the other exception could be is if you have a student who will only work for the iPad, if they're only motivated by the iPad, and then that would be another reason that you would be using it. But in general, I definitely would not suggest it for the younger crowd, especially for your early intervention kids. I have had some SLPs reached out to me and ask about therapy materials on the iPad for this population. And I honestly don't even create them. I mean, I do have some that would work for preschool, but I would say almost never use these for your EI students. All right. So the next thing is to not set your students up with the device and walk away. I would assume that most of us are not doing this, but I did feel the need to say it. And I do feel like maybe some people might be doing this, but I hope not. But getting your students set up with an activity and walking away is not skilled. So if you do this every once in a while for like a minute while you're helping another student, that's a totally different scenario. Or if you are taking data, maybe you have, you know, one day a month where you really want to get some good data, because of course every single session, you don't need to be spending lots of time on data, but maybe you have a time once a quarter where you really try to touch base with the data that you're collecting on this specific student, and maybe you're sitting next to your student and not interacting as much as you usually would be. That's not an issue. That's not what I'm talking about here, but I mean, just handing the iPad and walking away and doing something else that is not what this is about. So most of the resources that I create, actually, you can't even do that. I guess, unless your student's older, I guess you technically could, but especially for the younger ones, they're not going to be able to navigate the activities necessarily. And a lot of the activities require discussion. And that's the other thing when you're using the iPad, you don't want it just to be something that grabs your students' attention and it stays within the iPad. You want this to foster conversation, you want this to be something where you're, you know, going back and forth amongst yourselves or within a group. So, anyway, like I said, don't feel guilty if, you know, you have to set them up with it for a quick second while you're collecting data, but this is not something that you would want to make a habit of doing in general. You don't want to set your students up with this and, and back away. You really want this to be a hands-on experience where you're interacting with the device, with your students. So I already kind of touched on this, but let's move onto my next tip. So when you don't discuss what you're doing on the iPad, and when you don't use it in an interactive way where joint attention is established, it can actually hinder communication skills instead of facilitate them. And this kind of goes back to, like I said, what I was talking about before, where I said, you know, don't just set your student up and walk away. You just want to make sure it's a back and forth. It's like a conversation. You, the student and the device or the students, I guess if it's a group, but you want to make sure that you're all involved in that you're all interacting. The next thing that I want to say is to not make the tablet, the only thing that you use in your therapy session. So students get bored of the same thing and too much tech is not necessarily a good thing. So you want to make your sessions up, include things like movement, talk about books, art project, have some sensory experiences, and then, you know, also incorporate a little bit of technology. It's really a balancing act. This is how our students are going to thrive the most is if we're balancing all these things and not overloading them in one area or another. And like I mentioned before, the exception here is teletherapy. So in teletherapy you have to, you have to use tech, you know, a 100% of the time for the most part. So that's a whole, whole different ball game. So when I am saying these things, please keep in mind that it does not necessarily apply to teletherapy. The other thing is we want to keep our parents involved and we want them to understand exactly what it is that we're doing with the iPad. So they might just see us with the iPad and think that it is okay to just set a student up with it and walk away. So you don't want to pass on an app recommendation or No Print recommendation to a parent to use with the child at home without giving them some level of training. And it can be pretty informal. You know, you don't have to have them necessarily come into the session. I mean, if you could, that of course would be great, but you don't necessarily need to do that, but they just might not understand that it's crucial to be a participant in the activity instead of walking away and letting the child navigate the activity on their own. So you just want to be very clear about the expectations of when they're using the app that you want the parent to be right there, guiding the student through the app, and you want to be discussing as you go along. The other thing is that you want to also educate your parents about the benefits of avoiding technology for promoting social skills. You know, we have seen the effects of smartphones and what that has done to our social skills, even for neuro-typical adults. So, I mean, think about being in the elevator with a bunch of adults and everyone's looking down awkwardly on their phone trying to avoid eye contact or conversations. I mean, I'm sure everyone has done it, but you know, this is becoming more and more common. This is, this is the norm. And I think as schools are incorporating more and more technology, it's important to let parents know that there is such a thing as too much technology time. And this goes for all kids, but especially for those who are working on social skills. So according to a Stanford study, girls ages 8 to 12, who spent a lot of time consuming media and attempting to multitask, they reported lower self-esteem and more difficulty socializing than their less media-driven peers. And the author of this study, Clifford Nass said it's for children to spend more time interacting with others face-to-face and thereby learning crucial skills and emotional recognition. Now as speech-language pathologist, I am sure that that does not come as a surprise to any of us that the solution to that problem would be to spend more time interacting with others face-to-face. You know, when you use technology with these students, I highly highly suggest having control of the iPad, meaning that you're using it and using the app or No Print resource as a discussion piece, instead of something that they are clicking and scrolling through. Know that technology can be very addicting. So if they're sitting there tapping on all the different things that can be interacted with on the iPad screen, that's going to be distracting. If you lose control of the session because they are so tempted by that, then, you know, that's not what we're going for here either. If you're not familiar, there's something called Guided Access where you can kind of lock off different parts of the iPad, which can be good in certain scenarios. I personally used it whenever my children were younger and we would FaceTime with family who lived, you know, at a distance. And I found that my children, they loved, I mean, even at an early age, it's so crazy how addicting technology can be, but they would try to press those buttons and they would end up hanging up on whoever it was that we were talking to. So anyway, there's something called Guided Access. And whenever you activate that, it will essentially deactivate certain parts of your screen. So the thing is, is that you need to go in beforehand and have this all set up. It does take a little bit of time but it can be great for certain apps or depending on what you're using on the iPad. It can be really great to have on there to prevent your student from clicking something that they shouldn't or like I said, kind of help you regain control a little bit more. But some of these students...that might even be too much, you know, I think it's a good thing to have it almost like a book like you read in front of a group. Have the iPad in front of the group and you have control and you do the clicking. And I personally believe that is going to be the best way to use these with students who are working on social skills as a goal.
So that wraps up the podcast for today. I really hope that you learned some new ideas for incorporating technology into your speech room. If you have any questions for me, I am always happy to continue the conversation. You can shoot me an email at jessica@thedigitalslp.com or you can always DM me on Instagram. My handle is @thedigitalslp. To see some of the links and video demos of the resources that I mentioned today, you'll want to access the show notes, which you can do by going to bitly.com/techforslps. If you are interested in learning more about digital resources, head on over to thedigitalslp.com. And if you're interested in learning more about The Digital SLP membership, you can head on over to thedigitalslp.com/digitalslp. I did want to throw it out there that I, like I mentioned, I do own and operate The Digital SLP membership site. As of now, this podcast that you're listening to is called The Speech Space. So when you do subscribe, which you can do by going to bitly.com/thespeechspacepodcast, and you can go ahead and subscribe that way. If you don't have a chance to subscribe right now, and you go to search for the podcast down the road, I just wanted to give you a heads up that it is likely that the name is going to be changing to The Digital SLP. So if you think of this podcast later and you go to search it and you search The Speech Space and it does not pop up, then go ahead and type in The Digital SLP. And hopefully you'll find it that way. But like I said, the easiest way to subscribe is just to go to bitly.com/thespeechspacepodcast. And you can just click that will take you right into iTunes and you can just click on subscribe. It was such a pleasure to be a part of the very first SLP Live POD Conference. Thank you so much for tuning in my podcast. I hope that you have a great week and Venita is going to jump on here in a second and tell you a bit more about how you can get your CEUs for listening.
Venita: Thank you for participating in SLP Live. Remember that listening to this POD course does not automatically guarantee ASHA CEUs. If you want to earn up to 0.8 ASHA CEUs for this conference, there's just a small $25 administration fee to process and submit your paperwork. You can pay this administration fee and find more details at slp-live.com. Once your purchase is made, an email will be sent to you containing the course evaluation, feedback survey, and CEU paperwork. Please submit these materials by November 9th, 2019 at 8:00 PM Eastern Standard Time. SLP Live would like to thank its sponsors for offering products, services, and/or discounts as giveaways to attendees at no charge. You can see a list of these sponsors on the SLP Live website. SLP Live would also like to thank the presenter of this course who has provided her speaking services at no charge. Can't get enough CEUs? Medbridge Continuing Education has offered to give away a premium membership. Yes, a premium membership! You can enter to win by taking a screenshot of this course and sharing it on social media. Use the hashtag #slplive2019, so we can find you and you don't miss out. The winner will be announced by November 11th, 2019 at midnight Eastern Standard Time. Thank you so much for listening, and we hope you enjoyed this very first annual POD Con.
[Start of Q&A]
Venita: Hi guys! So we're waiting for Jessica to jump on. Oh there she is! Perfect! Awesome! So that was easy enough. So, Jessica, I don't know if you saw, you had a couple of questions in the Q&A. I'll go and read them.
Jessica: Thank you.
Venita: So one of the questions was from Emily, and I know you kind of answered some of that in the actual episode towards the end, but she said, I see kids in their homes and in my private practice. How do I get parents on board for digital? I've been asked not to use my iPad with kids because of the screen time limits.
Jessica: Yeah, I think the two biggest things would be education and demonstration. So you really want to educate the parents on what it is that you're doing. Because I think that tech can get a bad reputation and there's good reason for that, you know, but if we show the parents that it can be an interactive experience, then I think that that can help to change their perspective. And I touched on that a little bit towards the end of the podcast so hopefully that clarified some as well.
Venita: Perfect. And then there was another question that you mentioned a different app in regards to adult TBI. Are there other apps that you recommend for adults?
Jessica: For adults? Hmm, off the top of my head... No... They're like I can see their logos but I can't, I can't remember the names of them off the top of my head. Whoever sent that, if you want to email me, I would be happy to look into that a little bit more because I am completely blanking on what those apps are. But the one I was talking about in the podcast is called What Diff and it compares two pictures and you have to identify the differences. So...
Venita: I think, and on top of my head, I haven't like worked with adults in quite a while, but remember, I remember the Tactus Therapy apps.
Jessica: That's fun. Yeah. There's another one. Oh my goodness. Yeah. I just, I can't remember it right now. There's two that I'm thinking of and I would have to, I would have to look it up. I would be lying if I make them up right now.
Venita: That's okay.
Jessica: I did want to drop the link in. I know I mentioned that and I saw from Leslie, the 404. I just wanted to clarify that really quickly. So that's not going to go live until tomorrow because that's the link to the actual podcast, which has not gone online yet. And then whenever that goes live, then you'll have access to the worksheet that I mentioned. And then all the links mentioned in today's show.
Venita: Thank you for clarifying that. And then there was, oh, and the worksheets included in that.
Jessica: Same thing. Yeah. It's the same thing. I'm sorry about that. The timing was just a little, a little off by one day.
Venita: Yep. Perfect. Well, thank you so much. You shared so many awesome tips for going digital in the speech room. So I appreciate that.
Jessica: Yeah, no problem. Thank you so much for inviting me. This is a lot of fun.
Venita: All right. Well, we are going to start to recess course pretty soon. We'll have a... we usually start a little later each night. So give us about three to five minutes and we'll be on very shortly. So hope to see you guys there as well. Thanks again, Jessica.
Jessica: Bye.
Venita: Bye.
[End of Q&A]
[Jessica Answering FAQs]
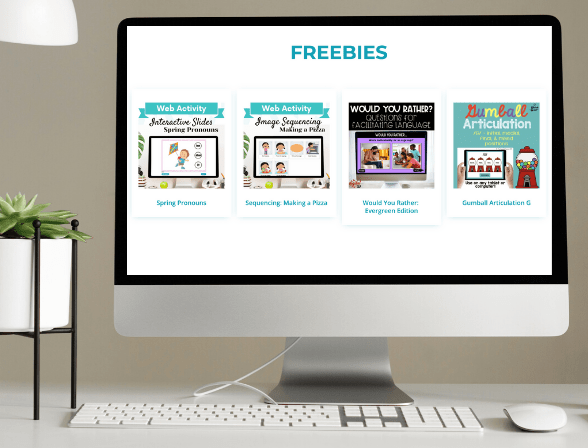
Hey there you guys. I just wanted to hop on for a few extra minutes. It looks like we wrapped up the Q &A a little bit early. So I did want to mention, and I forgot to mention during the live podcast that I do offer an Animal No Print that you can try out for free. So if you want to try out a little bit of tech in your speech in this week, then I do offer a download that you can try for free. You can find it at bitly.com/animalnoprint. And you can download that and open it up using a PDF reader like iBooks or Adobe Acrobat. And you can give that a try and see how you like using No Prints. I also wanted to just answer some FAQ's. So if you were on listening live and you might've heard someone asked about adult apps for speech therapy, and I completely spaced out on the names of them, I could kind of see in my head what they did, you know, the functionality, but I couldn't remember the names. So the two adult apps that I'm most familiar with that I've used a lot are Lumosity and Constant Therapy. So those are two apps that I would recommend for those working with adults.
Another question I get a lot is what is the favorite, my favorite app that I use as part of my public library subscription. And my answer to that is Hoopla. And I don't have a really, a scientific reason why. It's just the one that I prefer using. I think it's the most user-friendly and it has a nice variety of resources, which I appreciate.
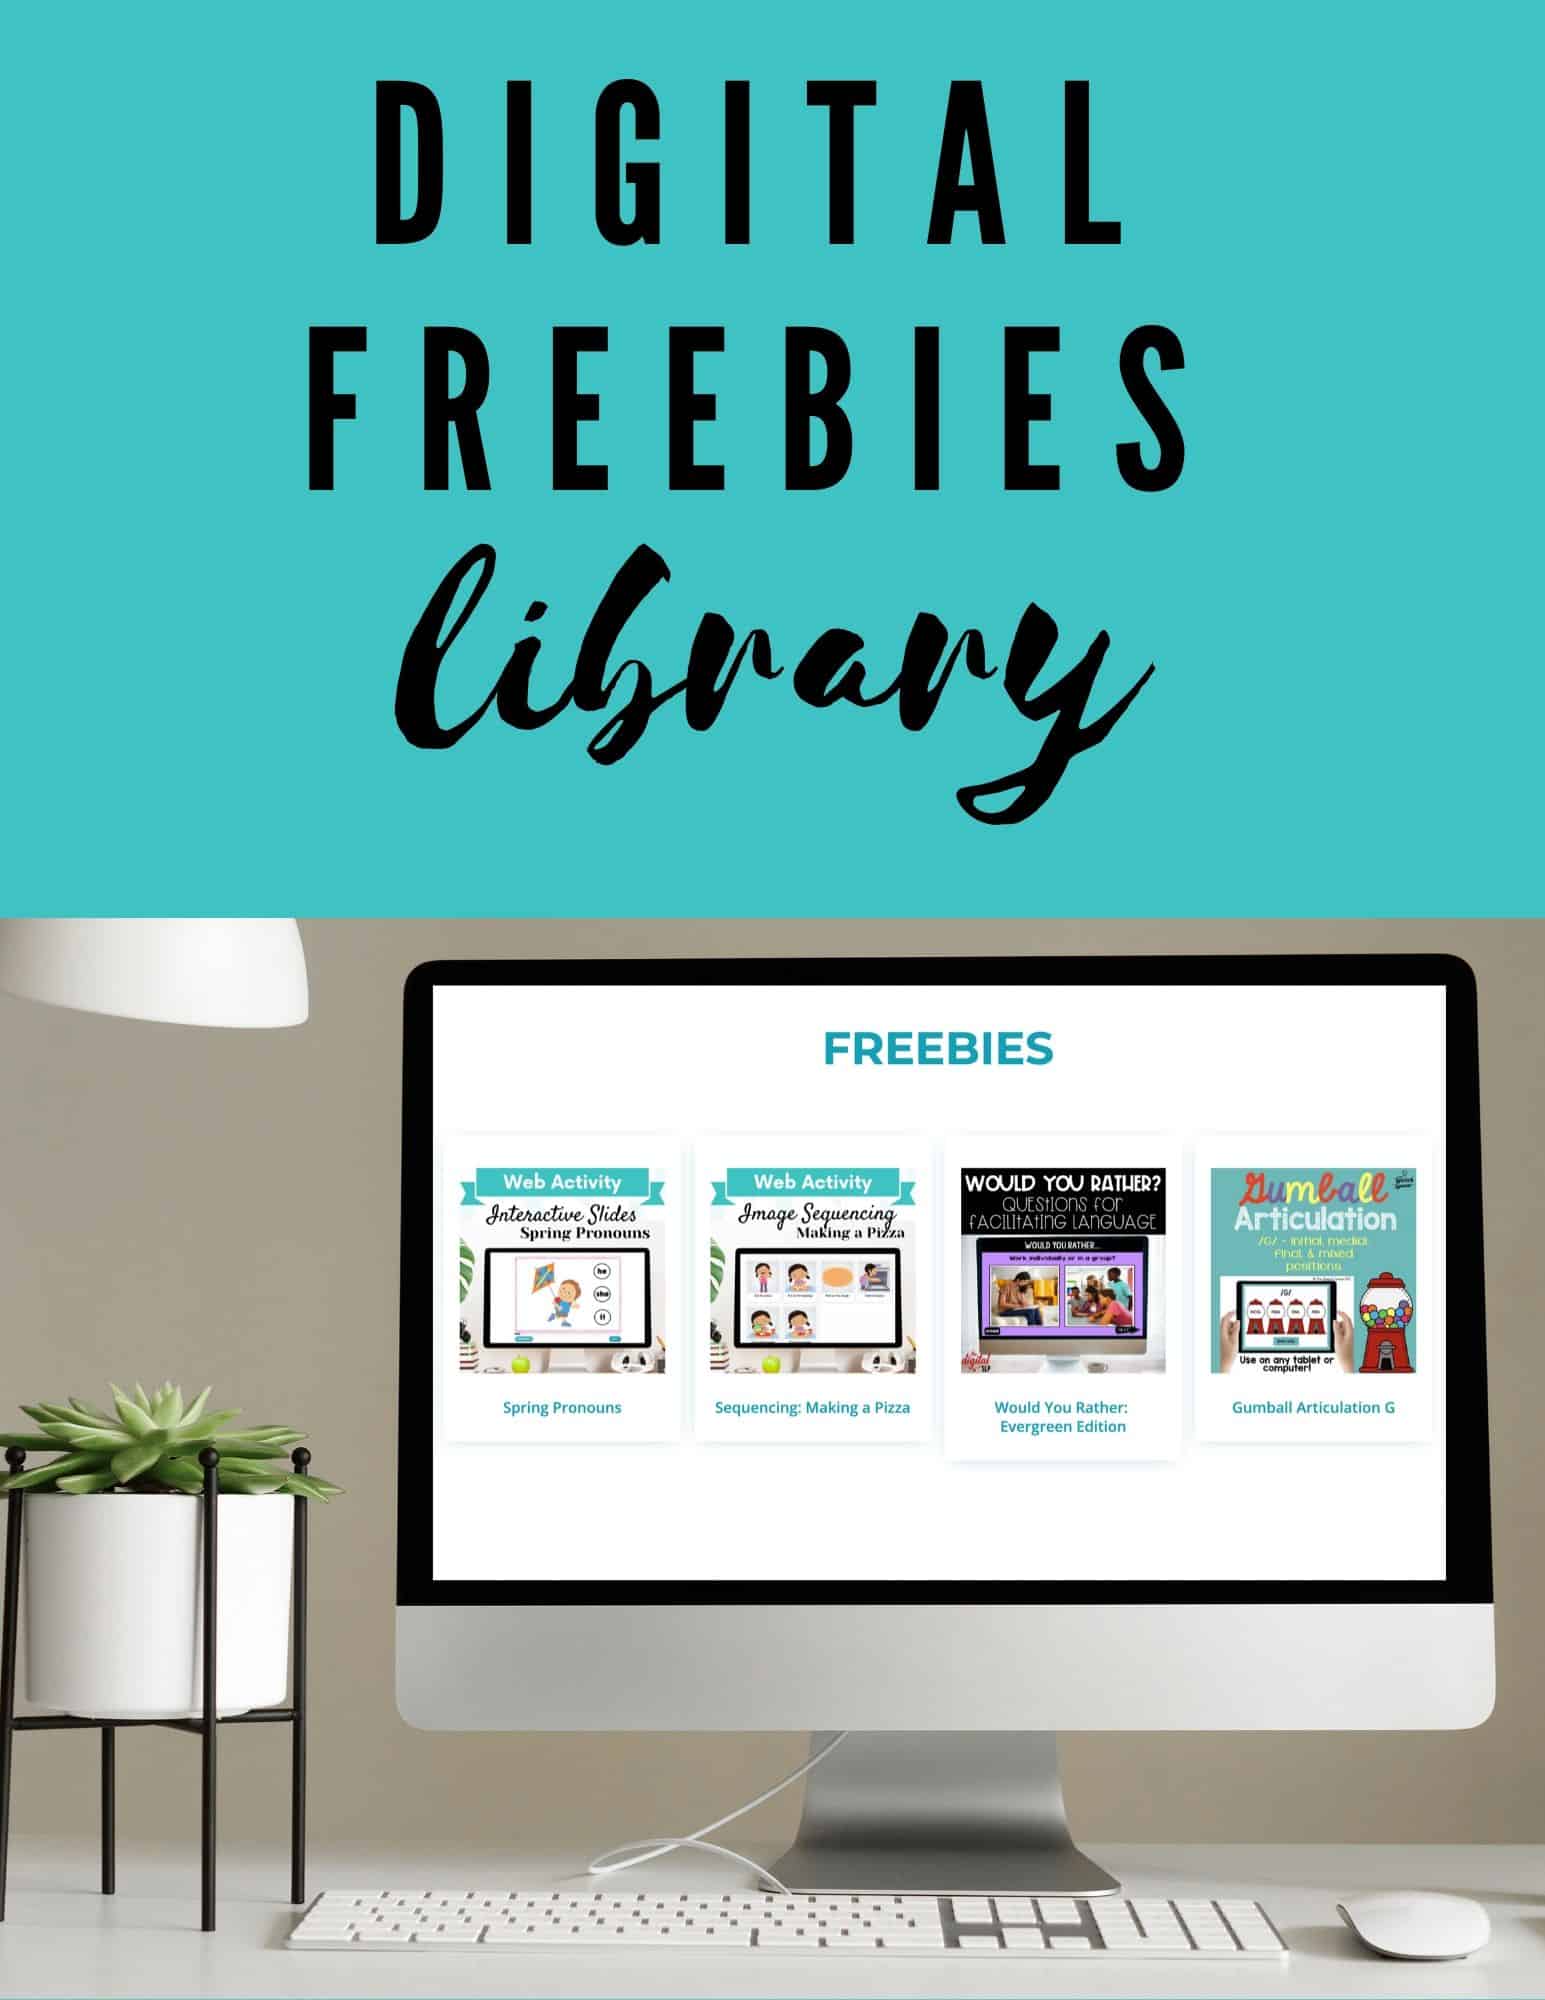
Let's see. Another question that I get a lot is how can I use an open-ended No Print resource? So for example, something like, one of my Would You Rather resources or Caption This resources. You know, you can make these yourself by just looking up images. You know, I'd been mentioned Pixabay during the presentation, that's an option for getting some free images. But I love this question because the possibilities really are endless. So for the Would You Rather task you could work on using fluency strategies while explaining your answer. You know, you could have your student be mindful of which strategy they were going to use and then ask them a question, or would you rather question and then have them use those strategies as they were explaining to you, why they chose what they chose. You could have them debate over which answer they think is the best. You could have students compare and contrast the two different scenarios or questions that are provided there in the Would You Rather page. And let's talk about the Caption This resource. So for my Caption This resources, they're really just images. And usually they're kind of silly, of like an animal doing something weird or a baby dressed up. But you really, again, like I said, you can grab these images, create your own, you don't have to use mine. You could even use a magazine if you had a magazine lying around and just pick out a silly picture, ask your student to caption it, but you could work on descriptive language where the students are describing exactly what they see. You could work on comparing and contrasting two different things shown within the image. You could have the students come up with an on-topic comment for the image, if there is a person or an animal picture there, and then you could have them come up with an off-topic comment for the same exact image. You could have one student look at the screen and, you know, have it out of view for the other student or students, and then have those students ask 20 questions or they can kind of split that up. If it's one other student, they could ask 20 questions or I guess up to 20 questions to try to guess what the animal or scene or person is on the screen that this one student is viewing. And I should also mention that for articulation picture scenes, they are often loaded with words with speech sound targets. So sometimes you don't even need a specific articulation resource. You could really just show an image to your student and challenge them to look at that picture scene and to find images with their speech sounds in it.
Another question that I get frequently is people ask if I prefer using my computer or my tablet when using No Prints. And honestly it really depends on what we're doing, but generally I would have to say I prefer the tablet. I like how they're all stored within Adobe Acrobat or iBooks. It's kind of like a little library and you can even make up different categories within your library storage there, like different folders to keep them in. You can pull them up very easily. You can pass it around very easily within a group. So if I had to choose, I would probably say that I prefer using the No Prints on the tablets. So I hope that these FAQs answered some lingering questions that you might've had. And thank you for tuning in.


Recent Comments