Table of Contents
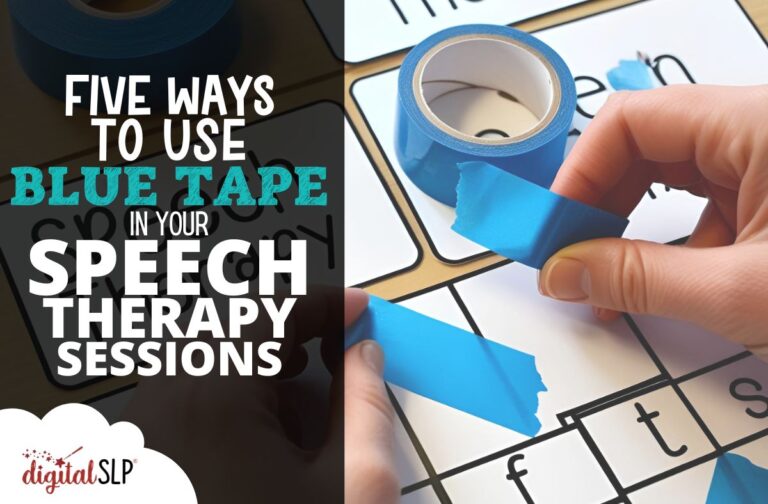
Welcome to April! This is the fourth installment in our series on targeting multiple goals with one resource, and this month we’ll discover the joy of blue tape (also known as painters tape).
The goal is for these ideas to be as flexible and functional as possible (and they’ll work for any tape you happen to have on hand!), so I’ll offer suggested goal areas and age groups, but please feel free to make adjustments as needed.
Let’s jump into five ways to use blue tape in your speech therapy sessions!
Tape the Room: Using Blue Tape for Any Articulation or Language Goal
For this straightforward activity, give each student or client a length of tape, then instruct them to tear it into a given number of pieces and put the pieces on objects around the speech room. The types of objects they choose will depend on their goals.
For example, students could look for objects that include their target speech sounds in the name. Or, if they have language goals, they could select objects to describe, categorize, or use in sentences. Once each student has put tape on the required number of objects, the group can reconvene, move around the room, and take turns talking about the taped objects.
You could also use a “Find the Tape” format for this activity: “pre-tape” relevant objects before students arrive, then have them find and discuss the objects during their session.
(Side note: I also wanted to call this activity “Tape Takeover,” “Language Labels,” or even “Sticky Articky,” so please pick your favorite name or invite your students to come up with their own!)
Tape Roads: Using Blue Tape for Play and Early Language Skills
Use tape to create a path through your speech room (and beyond, if it works for your context!). Students can roll cars, trucks, balls, and other toys along the path, and you can model language structures as they play (“Oh look! The truck is going around the curve!”). You could also add signs, bridges, crosswalks, etc. for additional practice with describing and spatial concepts.
This is also a great activity to work on following directions! And for articulation practice, you could place word or picture cards at various points along the “road” and have students pause and practice whenever they reach a new word.
The Great Tape Debate: Using Blue Tape for Discussion and Social Communication
Use a line of tape on the floor to divide the speech room in half. As you read opinion-based statements out loud, students can move to one side of the room depending on whether they agree or disagree with the statement.
Then, after each statement, students could spend time asking each other follow-up questions and discussing the reasons behind their choices. For an intriguing twist, they could even move to the other side of the room if they change their opinion based on ideas from their classmates. This activity would also work well with “would you rather?” questions!
Tape Story Walk: Using Blue Tape for Narrative Practice
Use tape on the floor to create a path that winds throughout the speech room, then place sticky notes or pieces of tape along the path with different story grammar elements (setting, characters, problem, etc.) written on them.
As students walk along the path, they can collaborate to build a narrative using the story grammar elements as a guide. After creating the story, you could remove the sticky notes and invite students to walk the path again and retell the story from memory!
Another option for combining blue tape with narrative practice is to label pieces of tape with story grammar elements, put them on a white board, then have students brainstorm ideas for each element, write them on sticky notes, and place them on the appropriate section of the white board. Once students have a collection of ideas, they could select their favorites and use them to create a full story.
Wall of Words: Using Blue Tape for Vocabulary Development
Use tape to create a grid on a wall, whiteboard, or table. Label the grid sections with categories, parts of speech, or whatever targets are relevant for your students, then give students pictures or word cards to place on the correct part of the grid—using tiny pieces of tape, of course! (Blue tape is fairly easy to remove, but you could also write words or targets on sticky notes to be extra safe.)
I love how the simplicity of these activities reminds me that sometimes, all it takes is a tiny bit of novelty to maintain student engagement, and a little bit of creativity to turn a humble tool into a speech superstar!
Please reach out if you try these ideas or if you have any to add to the list. And if you love simple, effective digital materials that can be used with a variety of age groups, consider signing up for a Digital SLP membership! Click here to learn more.


Recent Comments